How to Use Security FireWall Log
1. First go to your Security Dashboard. Choose "Site Security" in the "Services" menu:

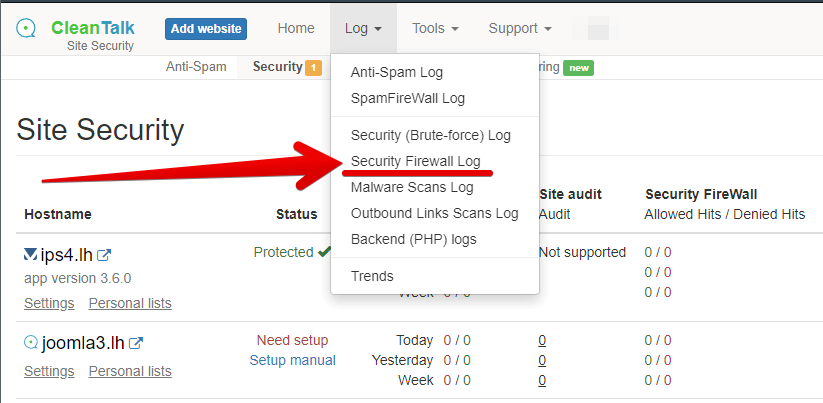
2. Then go to your Security FireWall Log:

3. You are on the Security FireWall Log page now:

1. Export logs button. You can export your logs to an CSV file.
2. Filters section.
A - The time period for all records you want to see.
B - Website for which you want to see the security firewall records.
Leave the field empty to see the security firewall records for all websites.
C - Searching records by an IP address.
D - Searching records by a country.
E - Searching records by the filtration result (Allow/Deny).
F - Searching records by a User-Agent. Works with partial words too.

3. Date when the event happened.
4. Website where the event happened.
5. Request's URL.
6. Visitor's IP information.
7. What country that IP belongs to.
8. The number of events that happened.
9.Result (Allow/Deny). Possible reasons of blocking by the Security Firewall and their descriptions:
- Deny - А visitor’s IP address is blacklisted by common CleanTalk list or by the personal blacklists of your website.
- Deny by network - А visitor’s IP address belongs to a subnet of high spam activity, or to a subnet that cannot have IP addresses of real human visitors.
- Deny by DDoS - DoS activity detected from the visitor's IP address. Visitor exceeded the number of allowed requests set by Traffic control.
- Deny by WAF - Malicious code has been detected in the GET-requests to your website (XSS attack), injection of malicious SQL requests to your website has been detected (SQL-injection attack), exploit detected, malicious files upload detected.
- Attacks to hack admin access - brute-force on login page detected.
- Denied by WAF Blocker for 24 hours - Several attempts at malicious activity.
- BlackListed by hacking attempts - hacking attempts detected.
- BlackListed by suspicious activity - suspicious activity detected.
- Allowed - Passed by common lists.
- Allowed by trusted network - Passed by trusted lists.
- Allowed by whitelist - Passed by personal lists. Whitelisted.
You can add IP to your personal Security list by pressing the "To Personal black & white lists".
If you haven't found the answer to your question, please, contact our support team:
https://cleantalk.org/my/support/open
It would also be interesting
- All Installation Manuals of CleanTalk Anti-Spam ServiceCleanTalk Anti-Spam Installation Guides Here you can find our plugin installation guides for popular...
- How to Block Facebook Crawler Bot with CleanTalk for WordPressHow to Block Facebook Crawler Bot with CleanTalk for WordPress A specific crawler you might encounter...
- The CleanTalk Malware Scanner for WordPress. How it worksThe CleanTalk Malware Scanner for WordPress Quarantine Can files like OTF or ICO, JPEG,...